about the course calendar
Texts are to be read/watched/listened to for day they are listed. Homework in addition to texts will be presented in yellow. The schedule is subject to change; it is your responsibility to check it regularly.
We meet as a full class unless the schedule reads, “Meeting Individually.”
Jump to a week: 1 | 2 | 3 | 4 | 5 | 6 | 7 | 8 | 9 | 10 | 11 | 12 | 13 | 14 | 15 | 16
Week One: Introductions: Meet as Full Class
W 1/17: Introductions, Syllabus, Book; Anastasia, Brenna, Julianna, Natalia, Nick, Dana, Dominic, Liz, Paige, Kayla
Assignment for Friday, 1/19
Please read through the course web site carefully and post two questions you have about it to this anonymous form:https://forms.gle/1iAL8ATyNiSHLcJ28
If you have yet to complete the confidential Start of Semester survey I emailed earlier this week week, please do.
Please download each of the following required software applications, including the multiple browsers:
- Brackets plain-text editor
- FileZilla (free; make sure you download the Client version)
- Firefox Developer Edition (free)
- With the Firefox browser open: Web Developer Toolbar Firefox Add-on (free)
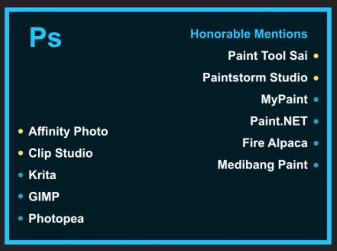
- Image-editing software (such as, Photoshop or any of the below alternatives should work; graphic by Bonnie Kyburz)
- As many different browsers as your operating system supports (e.g., Chrome, Opera, all free)
If you have any other questions, please let me know!
F 1/19: Brief intros, get to know each other; What is the Internet?; 40 Maps; submarine map
Week Two: First Look at HTML, Student Guests, Starting on Workflow
Assignment for Monday, 1/22
If you have yet to post your questions about the syllabus, please do so by Friday at 5:00pm so I can prepare them for class on Wednesday:https://forms.gle/EaqmsFTJBrpVJ8Dg6
You are required to have your own web domain, which you should have purchased in COM 200. If not, or if it has expired due to lack of use, please go to Reclaim Hosting and choose the Personal ($30/year) option (plus the $15 for the domain). Make sure your URL is professional and easily identified with you, like williamwolff.org is identified with me. Choose a .com or .net domain; try to avoid .org unless the others are taken. You will need to have the URL hosted by them, as well.
VERY IMPORTANT: If your URL has been expired for more than 30 days there is no guarantee Reclaim Hosting will be able to get the domain back, and for more than 90 days the data is no longer on their servers and it can take several weeks to get the old domain re-established. I strongly recommend you purchase a new domain and make sure you don’t let it expire. Student who have waited to get expired URLs re-established have found themselves very behind.
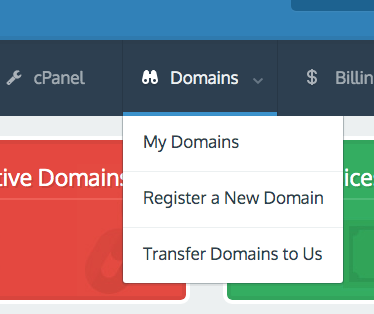
To check the status of your URL, or your Domain, log in to Reclaim Hosting and then hover over the Domains menu item and click on My Domains:
You MUST have your URL with you for class on Monday.
VERY IMPORTANT: Make sure you see the confirmation email Reclaim Hosting sends to you that has the subject heading, “[Reclaim Hosting] New Account Information.” It may take a day to get that confirmation email, so please don’t wait until the last minute to sign up. If you don’t see it, look in your spam. You MUST click on the link in that email or in a few weeks Reclaim Hosting will cancel your purchase.
In class on Wednesday, we will have prior Web Design students visiting to talk about their experiences in the class and respond to questions you have. By noon on Tuesday, 1/23, please add two or three questions using the below linked Questions for Student Guests form you’d like the students to address. Your questions can be about any aspect of the course; students will be honest in their responses. This is a very important day and students always say how much they get out of it, so do your best to be present. I’ll collate and prepare them for Wednesday, but I’ll need time to do that:
https://forms.gle/BccVARQcfe1xe83t9
If you have any questions, please do not hesitate to email me.
M 1/22: Sample HTML and CSS Code; Sample HTML5 & CSS page; sample-html.pdf; sample-style-css.pdf; URL check; URL Form
Share Individual Story of Learning Documents
Assignment for Wednesday, 1/24
There is quite a bit below, so please read carefully.If you have not downloaded and installed the software from the Friday 1/19 homework, you must have it in class on Wednesday.
If you did not add your URL to the below form on Monday, please do it immediately:
https://forms.gle/TNU6in9LgySv7G1a9
If you already have a WordPress blog set up at your URL, you will need to clone and move it for class (no info will be lost). To do this, please watch use this tutorial to do so by the start of class Wednesday:
I will be sharing with you your individual My Story of Learning GoogleDocs. That document is only available to me and each individual student; no one else can see it. Please watch this important video about the Story of Learning and come to class with any questions you have.
Your Story of Learning Part 1 is due 1/26 and your first weekly update is due on 2/2.
W 1/24: My Story of Learning; Syllabus Questions; setting up FTP
Assignment for Friday, 1/26
Please make sure have completed all the homework up to today.This Friday, we will have prior Web Design students visiting to talk about their experiences in the class and respond to questions you have.
I previously asked you to add your questions to the below GoogleForm. As of this writing, only SIX (of 18) students have added theirs. That is not acceptable. Please add your questions no later than noon on Tuesday, 1/25.
Your questions can be about any aspect of the course; students will be honest in their responses. This is a very important day and students always say how much they get out of it, so do your best to be present. I’ll collate and prepare them for Friday, but I’ll need time to do that:
https://forms.gle/BccVARQcfe1xe83t9
If you have any questions, please do not hesitate to email me.
F 1/26: Former Web Design Students Join Class
Part 1: My Story of Learning Due by 11:00pm
Week Three: Intro to HTML and Workflow
Assignment for Monday, 1/29
Your My Story of Learning Part 1 was due on Friday evening, so please make sure that is complete. Your first Weekly Update is due Friday 2/2 by 5:00pm.The assignments for this coming week are going to introduce you to your first HTML coding and the process of transferring your newly coded files to the server so you can read them on the web. There are two videos for the these three classes and they are below.
Monday marks the start of our weekly meetings, which as you know will take place via Zoom so we can share computer screens. I have emailed (or I will) you a link to the individual meeting schedule, but you can also access it on the Readings and Texts page. It is your responsibility to see when your weekly meetings are, as they rotate so everyone gets a Friday off from class. Be sure to arrive in the class Zoom (link also on the Readings page) a few minutes before so you are not late.
You are responsible for completing the required work for the day it is due — even if your individual meeting is not on that particular day. I will check that it is done. It is due by the time class would usually start. The assignments build on each and take time. Don’t let yourself get behind.
Please watch the below videos in the order they appear below; the first is needed in order to understand the second. We went over some of this in class on Wednesday, but seeing it again here will help. Take your time as you work through these videos and the coding below and for the other days.
Take notes; as riveting as they are, don’t watch them as if they are Netflix show. I’ve found students learn the material faster when they take notes. It can be tricky to get at first, but over time it will appear more natural. Don’t skip steps; with coding that leads to confusion. If you have questions or have trouble through any steps in the process, please let me know.
The Videos
This video will introduce you to the concept of servers, how we transfer files to the server, and web design workflow. (Some of it we discussed in class on Wednesday, but goes into greater depth.) The video covers:
0:00: What happens when you go to a web page using a browser and how servers function
6:00: Differentiating between The Internet and The World Wide Web
8:10: The Web Design Workflow (including creating your web design folder)
17:10: Starting the list of Best Practices
18:12: Transferring files from our computer to the server using FileZilla
27:50: Code, Save, Upload, Refresh, RepeatThis video will introduce you to how to setup your FTP account, connect to and use FileZilla, and start using Brackets. The video covers:
0:00: Getting the FTP account set up in Reclaim Hosting
4:00: Logging in to FileZilla using your FTP login info
9:25: Getting started with Brackets (or Atom) and creating your index.html page
11:30: The standard HTML skeleton for an HTML page
15:50: Using FileZilla to upload files to the server
17:35: Refreshing Firefox Dev Edition to see the coded page (YAY!) and repeating the processThe Coding Assignment
Please read Duckett, chapter 1, on the structure of an HTML page. When completed, I’d like you to try to code a very basic page, copying the code that Duckett presents on page 20. Copy the code verbatim, though you may include your own sample content. Then, also add the following code between the <html> and <body> tags so the start of your code looks like this (added code in bold) — I have added line numbers that should correspond to the lines in Brackets:1 <html>
2
3 <head>
4 <title></title>
5 </head>
6
7 <body>Then, Save the page in your web design folder as index.html. Note, always use all lowercase folder and file names.
When complete, upload your new index.html file to the public_html folder on your server using the Web Design Workflow steps in the videos above.
If you have trouble, only try to get it to work a few times. If it doesn’t, STOP. Note what you have done and if we meet on Monday, we’ll talk about it. If we don’t meet on Monday, email me immediately so we can set up a time to meet.
M 1/29: Meeting Individually via Zoom
W 1/31: Meeting Individually via Zoom
Assignment for Friday, 2/2
If you have yet to complete the homework due on Monday, do that immediately and let me know when it is completed. It needs to be completed before you can move on to the below homework.You are responsible for the work for each day regardless of when your individual meeting is. Do not wait to get it done. It must be done by the start of class the day it is due.
There are no videos to watch for Friday.
The Coding Assignment
Please read Duckett, chapters 2, 3, and 4. In the “index.html” file you worked on for Monday, please experiment with the following:
- three levels of headings
- paragraphs
- line breaks
- ordered lists
- unordered lists
Do not create a new file; these additions MUST go in the index.html file you already created between the<body></body> tags.
If you are feeling confident, try to find out how to make text bold and italics and add that.
As part of the lists you create, I’d like you to create ABSOLUTE links to 3 web pages that are important to you.
As you are coding, you can remove the default code you copied from Duckett and replace it with headings and paragraphs that are about you. Welcome people to your site and write a bit about yourself.
Remember, all of this content will be added between the opening <body> tag and the closing </body> tag. The only thing that goes outside the closing </body> tag is the closing </html> tag.
And please follow clean coding techniques, which are discussed around the 12:00 mark in the Setting Up and Using FTP and Brackets video you watched for Monday.Your first Story of Learning Weekly Update is due Friday, as well. Please make sure you are taking screenshots of your code and website to add to your weekly update.
As always, email me any and all questions you have.
F 2/2: Meeting Individually via Zoom
First Story of Learning Weekly Update Due by 5:00pm
Week Four: Images, Inclusive Design, and Emotional Design
Assignment for Monday, 2/5
There are three parts to the work for Monday: creating the portfolio.html page; linking the index.html and the portfolio.html together, and adding an image. The MUST be completed in order.Creating the portfolio.html page
In Brackets, please create a new HTML file called “portfolio.html” by going to File –> New to create the new file and then Save As, and save “portfolio.html” to your web design folder.In portfolio.html, code the base structure of an HTML page:
<html>
<head>
<title></title>
</head>
<body>
</body>
</html>
Then, between the body tags add your name as a <h1></h1> heading, using proper coding, such as <h1>Bill Wolff’s Portfolio</h1>.
Linking the index.html and portfolio.html together
Then, create a RELATIVE link from “index.html” to “portfolio.html” and one from “portfolio.html” to “index.html.” (See Duckett p. 80 for relative linking.)Upload both the new portfolio.html and revised index.html to the server using FileZilla. When asked if you want to Overwrite index.html, click Okay. Check to see if the links work.
Adding an image to your site
Before watching the video for Monday, please read Duckett on Images, pages 95-102 and 107 – 118. Then, find a photo of yourself that you feel comfortable putting online and rename it something meaningful (like, bill-portrait.jpg instead of PC450854.JPG), using no spaces and all lowercase letters, including in the extension (jpg instead of JPG, for example). Important: the image must be a .jpg, .png, or .gif; no other file format will work. The extension should also be all lowercase: .jpg not .JPG.Then, watch the video.
The Video
This video will introduce you to coding images in HTML, organizing your directory, and a bit of FTP review. The breakdown:
0:00: Review of the basic HTML skeleton for all pages
4:25: The basic code for images
7:20: Review of Code, save, upload, refresh, repeat, and Best Practices
8:15: Organizing the directory and creating the images folder
14:00: Breaking down the image code according to directory structure and more Best Practices
26:35: Coding the image again in Brackets and uploading it to the serverThe Assignment
After watching the video, please complete the steps as outlined in the video:
- Create a directory (folder) in your web design folder called images (all lowercase).
- Put the image you have selected into that folder.
- Create a directory (folder) in your public_html folder called images (all lowercase).
- Drag your image from the images folder in the web design folder into the images folder in the public_html folder on the server.
- If have yet to do so, re-code your index.html file to make it more friendly to someone who is coming to your site. You might explain that you are coding for a class and add a link to your blog, if you’d like. In other words, personalize it and remove all the default stuff that we added during week 3.
- Add to your index.html file the code for your image, as explained by Duckett and in the video. (You don’t need to add anything to the portfolio.html file.)
- Upload your updated index.html file to the server.
- Refresh Firefox Dev edition and see what happens!
Important Note
I’d like you to start getting into the habit of doing what is called a Hard Refresh when refreshing your FireFire Dev Edition browser. You will need to do this to ensure your CSS is working when we get to that, but (like much of what we are doing now) it is good to get into the habit of certain practices so it is more natural later. I can explain in more detail what a Hard Refresh does, but essential it ensures that your coding updates are being rendered.To do a Hard Refresh in FireFox Dev Edition, using the follow keys instead of clicking the refresh icon:
- Mac: COMMAMD + SHIFT + R (or SHIFT + Refresh Icon)
- PC: CTRL + SHIFT + R (or CTRL + F5)
And, remember, your first Weekly Update was due on Friday, so please complete it if you have yet to do so.
As always, email me any and all questions you have.
M 2/5: Full Class Meeting: Images
Assignment for Wednesday, 9/20
There are two parts to the work for Wednesday: 1. coding accessibility into your image code, and 2. a reading and video about inclusive design. Make sure you have time to complete both.Part 1. Coding Accessibility
In class on Monday we worked on getting our code correct and our images, as well as what ALT and Title text are. For Wednesday, please make sure your have:
- working absolute and relative links
- an image on your page that contains appropriate ALT and Title text
- clean code
If you weren’t in class, here is a video about ALT and Title text. Please watch it:
This video introduces the concept of Access First Design, how to create appropriate ALT and Title text for images, and accessible links. It covers:
0:00: Access First Design
4:40: Defining ALT and Title Text
9:15: First example of ALT and Title text
13:45: Second example of ALT and Title text
18:00: Creating accessible links
22:20: Final thoughts on accessibility and Human Centered DesignPart 2. Inclusive Design
To be prepare for our semester-long discussions of Inclusive Design, please read and take notes on the Microsoft Inclusive Design Toolkit (.pdf), which is part of the Inclusive Design section of their Design web site.Inclusive Design at Microsoft is now run by a 2010 SJU grad, , whose arms became paralyzed soon after graduating due to complications from ALS (Lou Gehrig’s Disease). Christina is the keynote speaker for the 2024 Day of Dialogue. You are required to register for her keynote either in person or via Zoom.
I’d like you to watch the below video of her talking about inclusive design. As says in the opening, “I look at disability as though I am disabled by design. It’s not motor-neuron disease that made me disabled. It’s the design of things”:
For class on Wednesday, I’d like you to choose one of the design principles discussed in the Toolkit — Recognize Exclusion, Learn from Diversity, or Solve for One, Extend to Many — and look for examples of them in your daily life and activities. Choose two of those examples, take a photo or screenshot of each, and be prepared to discuss them in class as examples of how the design results in disability.
If you have any questions, let me know.
W 2/7: Full Class Meeting: Inclusive Design
Hand out Project 1: Responsive, Accessible Portfolio Assignment
Assignment for Friday, 2/9
For Friday, first please read through the Project 1: Responsive, Accessible Portfolio Assignment. Come to class with questions.The work for Monday is going to get us started on considering the design elements of our sites and not just code.
Please read chapters 1, 2, and 3 of Aarron Walter’s Designing for Emotion (it’s a quick read with lots of pictures–see the Readings & Texts page).
Search the web for FIVE portfolio web sites by professionals in the field(s) you wish to go into upon graduation that you think embody emotional design principles and employ content well.
If you have any questions, please let me know.
F 2/9: Full Class Meeting: Emotional Design and Found Portfolios; emotional-design-notes-s24.docx
Week Five: Emotional Design, Simon Sinek, and HTML
Assignment for Monday, 2/12
There are two parts to the assignment for Monday.Part 1. tags.html reflection
Part 1 is going to give you an opportunity to review what you have learned so far, reflect on how you are feeling about what you have learned so far, and provide me with some additional insight about where each one of you are at.Around 4:15 on Friday I emailed you a file, tags.txt, which asks you to follow some prompts by adding the necessary code. For example, you will see:
<!-- PUT THE APPROPRIATE OPENING AND CLOSING TAGS AFTER THE DESCRIPTION -->
<!-- unordered list --> ADD RESPONSE HERE

<!-- ordered list --> ADD RESPONSE HERE
All you need to do is replace
ADD RESPONSE HEREwith the appropriate code. There are also a few questions to respond to.Though I will be assessing it, this is not a quiz, nor are you expected to have memorized any of the code. It is merely a moment share what you have learned and reflect a bit. You are welcome to use the book. The book’s index is extremely helpful. I recommend completing it by yourself, however, because it will give you a better insight into what you, yourself, knows.
To complete the assignment, follow these steps:
- Download tags.txt to your computer USING CHROME OR FIREFOX. DO NOT USE SAFARI!!!!!!!!!!
- Open it in Brackets by going to File –> Open and then save it to your web design folder as tags.html.
- Complete the document, saving as you go.
- Upload it to your public_html folder on the server by classtime on Monday. I’ll be able to find it and look at it after that.
If you have any questions, let me know.
Part 2. Emotional Design Notes and Simon Sinek
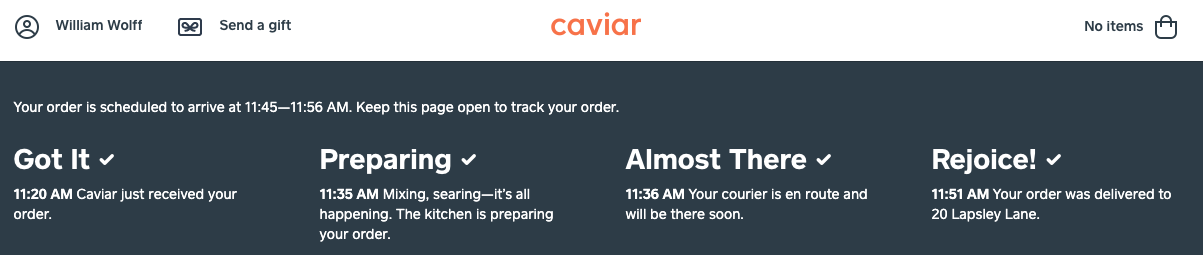
Please complete the emotional-design-notes-s24.docx that I introduced in class on Friday. Answering these questions will be very important as we begin to create a personality for our site. You will be adding to this document based on the Sinek video below and another assignment for Monday. Please have Parts 1 and 2 completed for class on Monday. This assignment will be assessed.Please read Walter, chapters 4 and 7, and Boulton (2007) and Muller (2012) on White Space (all available on the Readings and Texts page), and be ready to discuss them in class. Also continue looking for web sites that you think have a clear personality. Caviar, for example, has personality:
Please watch the below TED talk by Simon Sinek:
After watching Sinek’s talk, I’d like you to add to the Emotional Design notes document Part 2. two of your Why? statements. First address the question:
- What is your core belief that guides all of your actions in the world?
Second, address the question:
- What is your core belief that guides (or you hope to guide) your actions in the workforce?
Start each sentence with “I believe. . . .” The two can be related, though they don’t need to be.
If you have any questions, please let me know.
Your Story of Learning Weekly Update is due by 5:00pm on Friday.
M 2/12: Full Class Meeting: Simon Sinek and the Golden Circle; Vocal Type; Amplifier Art; Freres Branchiaux; 4Ocean; Paper Culture; ProPublica; Crazy Aarons; Conscious Step Socks; Who Gives a Crap
tags.html document due
Hand out Design Persona Assignment
Assignment for Wednesday, 2/14
The assignment for Wednesday is on the subject of diversity in the tech industry, a subject of great importance. It will further our discussions on being intentional in your design and career choices. Please read the articles by Sara Harrison (2019), Olu Niyiawosusi (2020).Then, I’d like you to look up the diversity statistics (or demographics) of the field you hope you join one day. (If you are unsure what you want to pursue, you can look up communications, marketing, or web design.) You can just search, “[your field + diversity statistics” or “[your field] + demographics.” Based on what you find, complete the following questions under the “Add Chosen Field Diversity Stats below” prompt in the Emotional Design Notes document we started last week week:
What are the demographics of your potential future field? Try to find statistics from 2021 or later. Break them down by (if possible) at least race, gender, gender identity, age, and disability. What do these statistics tell you about the diversity of your possible future field?
What kind business are you hoping to work for? Woman or minority owned? Why and what do you think the benefit would be working for that kind of business?
What would need to be part of a business’s mission statement to make you want to choose them? If you are interested in starting your own business, how will you show your commitment to diversity and inclusion?
When finished, share the document with me so it can be assessed. If, before you share it, you would prefer to remove your statements where you discuss your “core belief that guides all of your actions in the world,” please do. That was assigned for your own personal benefit and I don’t need to see it. I do, however need to see youranswer to the question
- What is your core belief that guides (or you hope to guide) your actions in the workforce?
Be ready to discuss the articles and have the answers to the questions ready in class.
W 2/14: Diversity in the Tech Industry; Diversity Spreadsheet
Assignment for Friday, 2/16
We move back to individual meetings via Zoom this Friday and next Monday and Wednesday. Be sure to see the schedule on the Readings and Texts page. The work must be completed each day, regardless of if you are meeting with me, and on days you are meeting with me, the work must be done prior to our meeting.There is quite a bit for Friday. Please follow the instructions exactly as written and complete it in order.
We are starting to work only in your portfolio.html file, not your index.html file. We will get back to index.html later in the semester.
- In your portfolio.html file, add three levels of headings to your page:
- <h1></h1>: your name;
- <h2></h2>: the word Portfolio;
- <h3></h3>: used twice, once for each of the titles of each of your portfolio items you will add in step 3.
- Go back to your emotional design notes document and look to the content section.
- Choose the two most important content items you wrote about and add them to your portfolio.html file below the appropriate <h3></h3> tag using the appropriate HTML image code. These should be images. If your item is a PDF doc, for example, take a screenshot of it, change the file name to something meaningful. (Please do not include videos just yet because we have not learned how to embed them.)
- Upload these portfolio item images to your images folder on the server.
- Directly under each portfolio item, include the following:
- A brief paragraph in which you describe the item you have created, if it was created for a particular community partner, your goals for it, and your role in creating it (sole creator, part of a team, etc.).
- Under the paragraph, include an unordered bulleted list where you list
- the software and/or hardware used (such as the camera)
- any camera settings that were used
- creation date
- any custom pallets or shortcuts you created for the project
- a link to download a PDF version of it (if applicable)
- Save and upload your updated portfolio.html file to the public_html folder (make sure you’re not putting in the images folder).
- Then, please read pages 429 – 439 in Duckett on HTML5.
- Then, watch the below video, which elaborates on Duckett. It also contains important information on HTML commenting, which is a way to help you leave notes for yourself in your code. Use these often.
The Video
The video covers:
0:00: Introduction to HTML5
2:45: Breaking down <section> and <header> tags
9:08: HTML Comments and adding notes in your code for yourself
10:58: Breaking down the <figure> tagHTML5 Assignment
After reading Duckett and watching the video, go to your newly updated portfolio.html file and add the following HTML5 codes in the appropriate places:
- <header></header>
- <section></section>
- <figure></figure>
Be sure to use the commenting techniques outlined in the video, as well.
If you add the codes correctly, you should not see any change to your portfolio as it looks in the browser.
If you have any questions, please let me know.
F 2/16: Meeting Individually via Zoom: Intro to HTML5
Week Six: HTML5 and Intro to CSS
Assignment for Monday, 2/19
If you have yet to complete the work for Friday, please do so immediately. You’ll be using the code created for Friday in the work you do for Monday.We’re going to be starting to learn CSS (Cascading Style Sheets), which is used to style web sites. The video for Monday discusses how to conceptualize what is happening when the browser is reading both .html and .css files together to lay out a web page, and highlights some very basic CSS coding. Both videos were created with the understanding that you will also read Duckett, so please be sure you are doing that, as well.
This is the moment when coding starts to get a bit more more complicated, so please pay special attention to the videos, take detailed notes, and use the book as a resource.
The Video
The video covers:
0:00: Introduction to CSS and envisioning the relationship between .html and .css files
3:00: The stylesheet code that links .html and .css together
10:58: Creating the styles folder (or directory) in FileZilla
11:55: Adding the stylesheet code to your .html file in Brackets
14:05: Creating the main.css file in Brackets
15:01: Coding a basic CSS page with color and uploading the files to the correct directories
30:30: What to look for when your page isn’t displaying as you think it shouldThe Assignment
After watching the video, make sure you have created the following that was described in it:
- the styles folder (or directory) in the web design folder on your computer and the public_html folder (or directory) on the server
- the main.css file saved to your styles folder
- the stylesheet linking code in the <head></head> section of portfolio.html
<link rel="stylesheet" href="styles/main.css" type="text/css" />
(Note, if you copy and paste this code from here, make sure the “” are square and not rounded. Rounded ones will cause it not to work.)When that is complete, please read Duckett 227 – 237 (ignore 238 and the rest of chapter 10 for now) and chapter 11, which introduce stylesheets (CSS) and how to style color in various ways (ignore the CSS3 stuff for now).
Please try to style color to the following selectors in your new main.css file:
- body
- h1
- h2
- h3
- p
- li
Please note that though we are working in the portfolio.html file right now, we are just testing out the CSS code and colors and playing a bit. Once you have your design persona finished, you’ll be changing the colors based on what you wrote in it.
As always, if things aren’t working for you as you code, please email me and let me know what is happening in as much detail as possible.
Open Coding starts this week, which is extra time for you to get help with your coding and anything else relating to class. I will email you the day and time. You will be able to sign up on the Individual Meetings Schedule page.
M 2/19: Meeting Individually via Zoom: CSS
Assignment for Wednesday, 2/21
The videos and assignment for Wednesday will continue to expand our introduction to CSS by focusing specifically on styling fonts and lists.To prepare for the video, I’d like you to read Duckett chapter 12 on text and chapter 14, only the content relating to lists. Please also read Santa Maria, chapters 3 and 4, on Web Typography (see the Readings and Texts page). This is a wonderful text that really digs into typeface, so read it carefully. (If you haven’t studied typeface before, I also encourage you to read chapters 1 and 2.)
The Videos
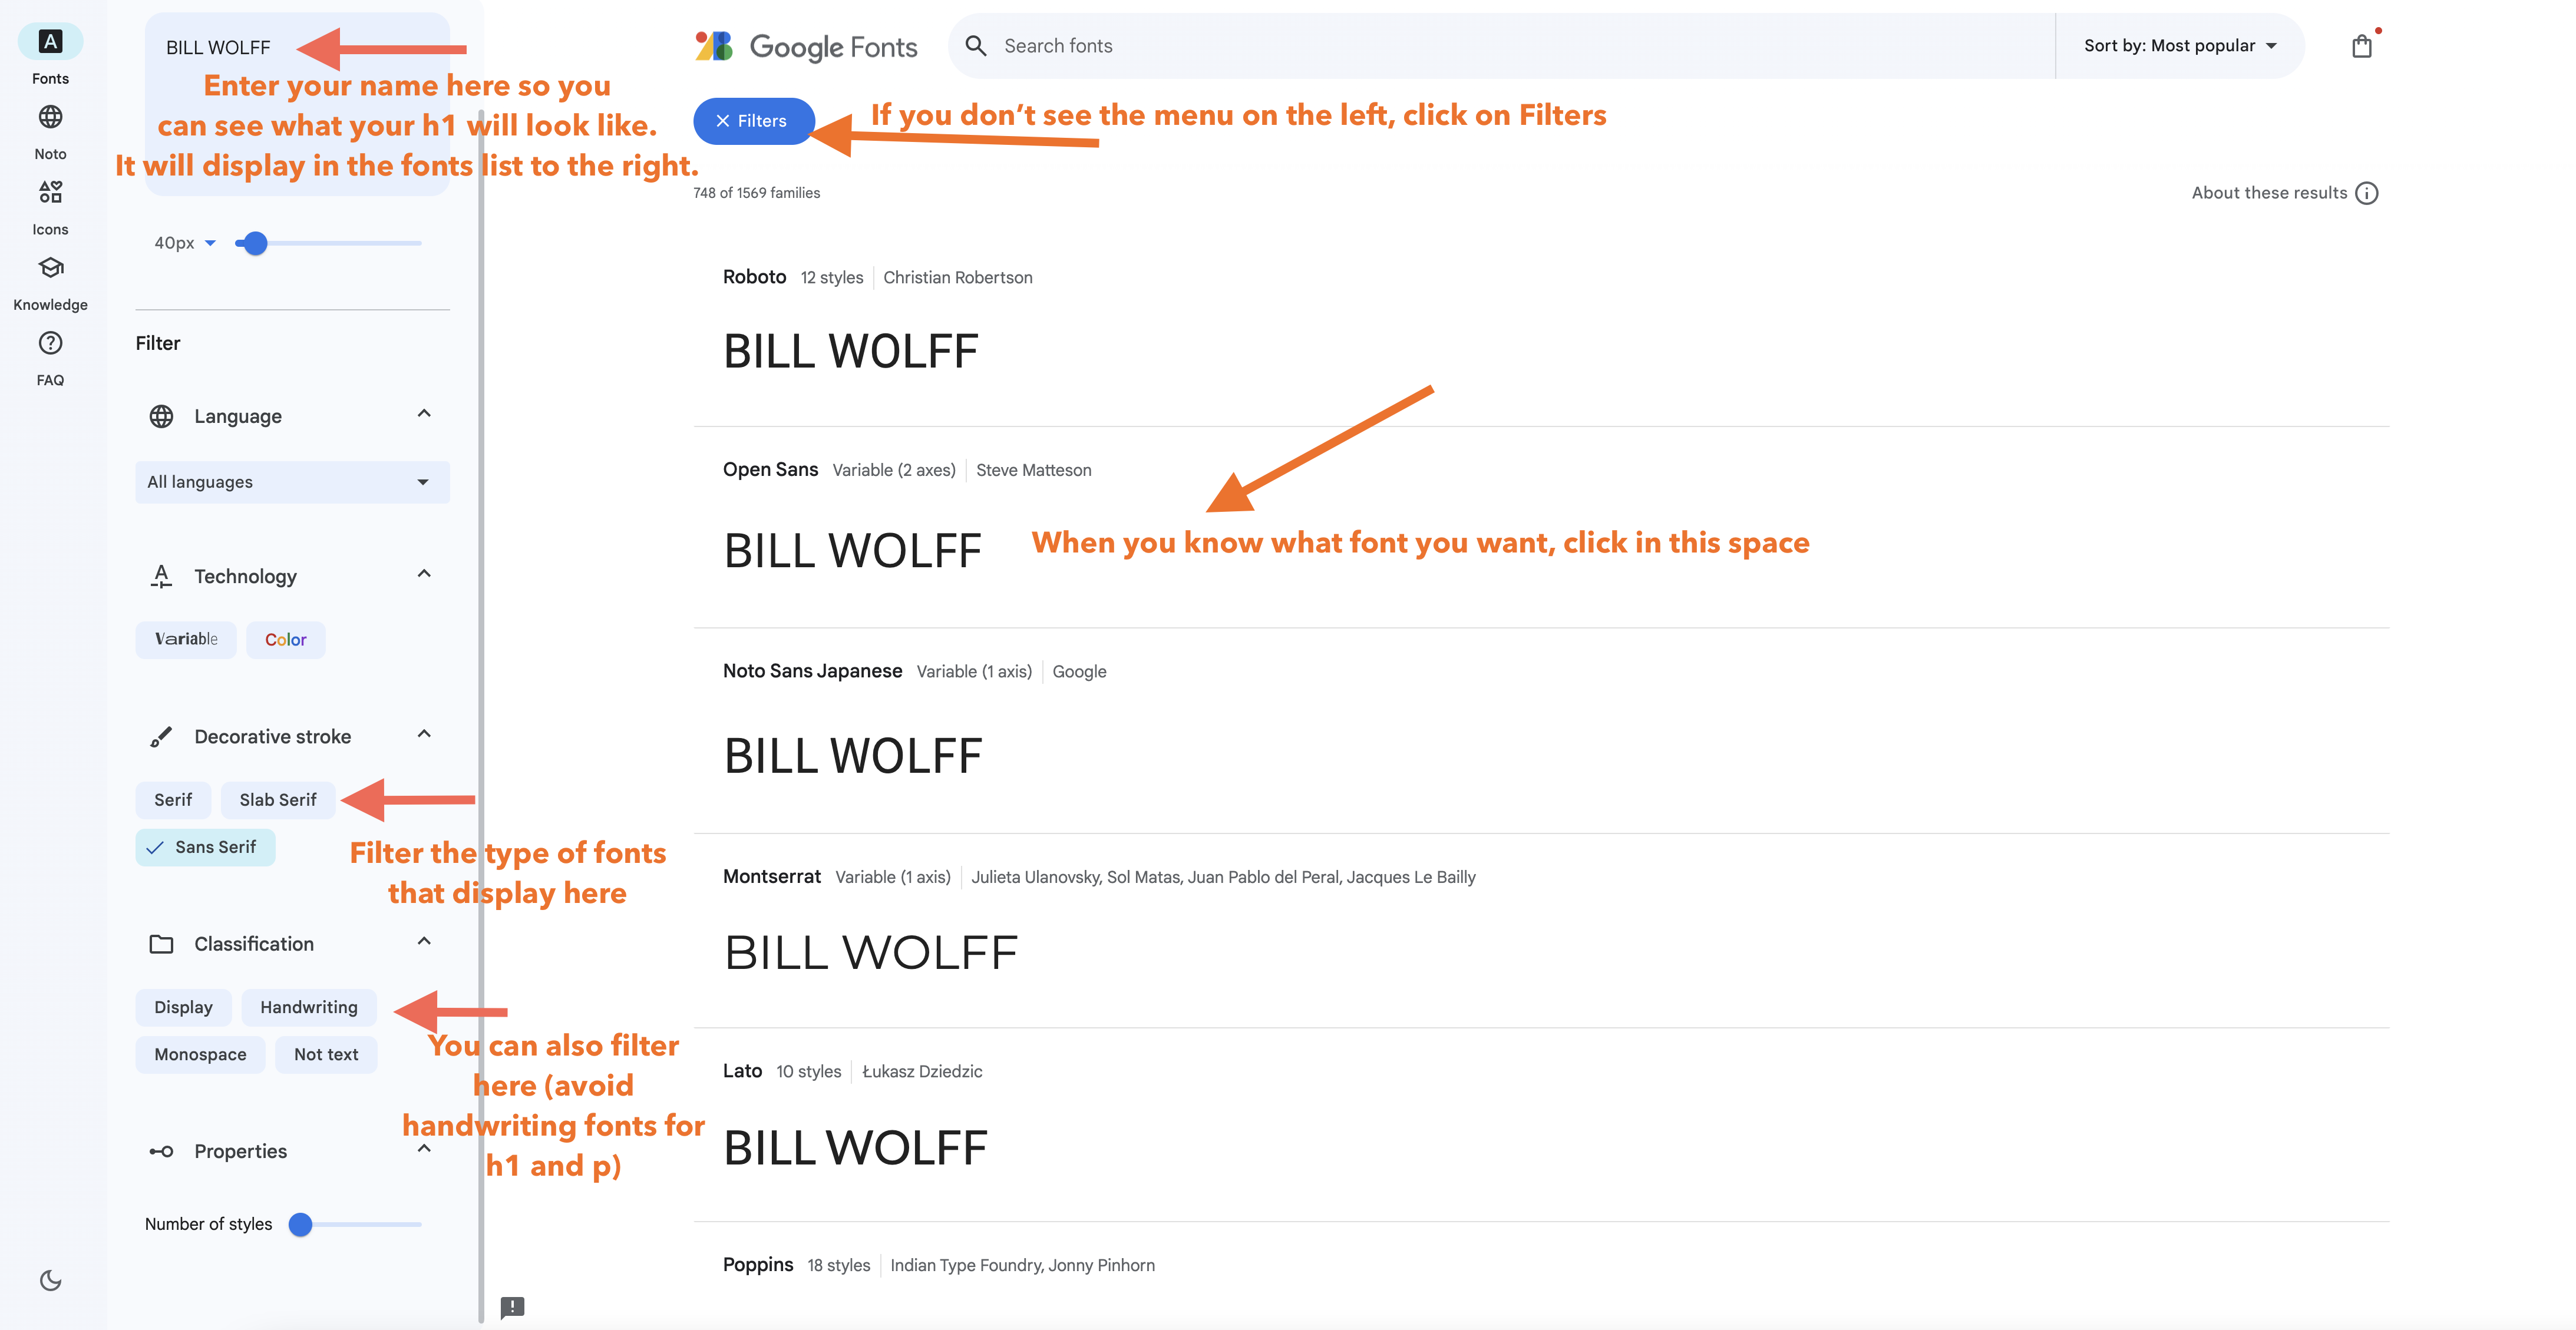
Note: In September, Google released a totally redesigned GoogleFonts interface. The same options as described in the video are there, just in a different place. Copying the font code (starting at 6:50 minutes) is very nearly exactly the same. Here is what the new interface looks like (click image for larger version):
Here is the video. Watch the whole thing because it discusses more than just the interface.
This video introduces you to Google Fonts and how to code Google Fonts into your HTML and CSS files. Please note that the GoogleFonts interface has changed slightly since this video was made, but the process of adding the code to your HTML and CSS is exactly the same. It covers:
0:00: Introduction to the Google Fonts web site
6:50: Selecting a Google Font and Coding it in to your siteThis video introduces how to size and display fonts using CSS. It covers:
0:00: Introducing font-sizing
1:15: On the font-family property
3:12: On the text-align property
4:00: On the font-size property and intro to Ems
9:05: On the letter-spacing property
11:10: On the line-height property
12:25: Pointing to additional font-related properties in DuckettThis video introduces sizing using the EM size unit. The video covers:
0:00: Introduction to Ems
2:25: Calculating Ems in terms of Pixels
2:50: Getting started with Ems, what to keep in mind
4:20: Calculating various Em sizesThe Assignment
Now that you have watched the videos on using Google Fonts and the basics of styling fonts, I’d like you to complete the following:
- Go to Google Fonts and select TWO Header fonts and ONE body font that you can experiment with for Wednesday (You will be more deliberately choosing font combinations for your Design Persona; this is just to experiment and play).
- Using the video and Duckett as guides, code in your Google Fonts and then style your h1, h2, h3, p, and li selectors with the following:
- font-family:
- font-size: (use ems, as in the video)
- letter-spacing: (use ems, as in the video)
- line-height: (use ems, as in the video)
- anything else you’d like to try from pages 279 – 282 in Duckett
- Style your ul or ol with:
- list-style-type: (page 333 in Duckett)
Be sure to upload your portfolio.html and main.css to the correct locations on the server.
Remember, Duckett is a wonderful resource for the kinds of things we are styling and the last page of his book is designed to to help you. It is a list of dozens of CSS Properties with page numbers so you can easily find you need.
I will be checking everyone’s web sites on Friday to see how you’re doing with the styling work, so be sure you are keeping up with it. As you can see, we’re moving faster now.
Remember to complete your Story of Learning weekly update.
And remember, Open Coding is available Thursday from 9:30 – 10:30. Sign up on the Individual Meetings Schedule.
If you have any questions, please let me know!
W 2/21: Meeting Individually via Zoom: CSS
F 2/23: Full Class Meeting: CSS and HTML Review
Discuss Midterm Story of Learning
Week Seven: More on CSS; fonts; and persona to code
Assignment for Monday, 2/26
There is no reading or coding for Monday, since your Design Personas are due by 11:00pm on Monday in the Google Drive folder that Bill shared with you in an email he sent on Friday.So Bill knows whose document is whose, please name your file:
yourlastname-design-persona-
s24.pdf In class on Monday we will be discussing <h1> font choices, so if you can have an idea which one you will be using, please have that with you. When choosing your fonts, be sure to use Jason Santa Maria’s book as a guide. We’ll be referring to it in class.
If you are behind with your coding, please use this time to get caught up a bit.
We meet as a FULL CLASS on Monday and Wednesday in Merion 150.
And don’t forget to complete your Weekly Story of Learning Update.
M 2/26: Full Class Meeting; fonts and meeting with coding groups; typeface-handout.pdf
Design Persona Due by 11:00pm in the Google Drive folder Bill shared
W 2/28: Full Class Meeting; persona to code and meeting with coding groups; persona-to-code-s24.docx
F 3/1: Class Canceled — Have a Great Spring Break!
Midterm Story of Learning due by 11:00pm
Spring Break 3/4 – 3/8
Week Eight: Conferences and Boxes
Assignment for Monday 3/11
We will be meeting as a FULL CLASS all next week. This is a VITAL week of class; try to keep up and to be present for each meeting.
This week we’re going to start jumping into more advanced CSS by thinking about layout and positioning. Doing this means talking about boxes, divisions, and floats, three of the more challenging concepts in CSS. But, once you get them you will be well on your way to designing the layouts of most sites. As with everything we’re doing, we’ll be going step by step through the process.
It is vital that you complete the work in the order assigned, and take detailed notes on the box model videos.
Part 1: Persona to Code
Make sure you have completed the persona-to-code-s24.docx, which we started in class on the Wednesday before Spring Break. One you’ve completed it, transfer the code from the document to your new main.css and see how your page is starting to come together. Then, move to Part 2.Part 2: Introduction to the Box Model
The below video introduces the concept of boxes, otherwise known as the Box Model. The Box Model is the most important concept for understanding how web pages are structured. The model includes your content area, padding, borders, and margins. Please watch it and take detailed notes.The video covers:
0:00: Intro to design elements as boxes
1:50: Intro to the Box Model: content, padding, border, margin
2:55: Padding
4:30: Border
5:30: Margins and multiple boxes next to each other
9:00: Applying widths to boxes (border-box)
12:05: Conceptualizing box width percentages
17:10: Looking at the widths in the codeCome to class ready to discuss and experiment a bit with boxes.
If you have any questions, please let me know.
Remember your Story of Learning Weekly Update was due on Friday before Spring Break.
M 3/11: Full class meeting (boxes)
Project 1 Rough Draft Checklist (.pdf)
Assignment for Wednesday, 3/13
The assignment for Wednesday builds on the Box Model video we watched for Monday and work we did in class on Monday. There are two Parts.Part 1. If you were absent on Monday
If you were absent on Monday, you MUST complete this before moving on to part 2.
I have created template files for you that must be implemented before moving on with your coding work. They are located on the Project 1 assignment page under the Preparing Your Files header.The below video walks you through the process of setting up the Project 1 template files. Please go through the video methodically, pausing it as you accomplish each step, then returning to it for the next step, and so on. This will help ensure you don’t miss a step along the way. Each step is extremely important, so follow the instructions exactly as described. Complete all of the steps and then you can move on to Part 2.
Part 2. Implementing the Box Model
To prepare for the videos, please read Duckett Chapter 8, which contains a variety of important concepts for more advanced layout, as well as tags you might find yourself using at some point. Please also read Marie Mosely on Box Sizing; much of it may be over your head, which is okay. You’ll start to get it soon.Then, watch the below video on styling boxes and laying out you portfolio items so they are side-by-side. It should be seen as a compliment to what you have read in Duckett, not a substitute for it. Follow along with the video, completing the assignment as you go.
0:00: Intro and review of the box model
3:30: Adding the box-sizing code
6:50: Centering boxes
10:25: Styling margins
12:50: Styling padding
16:22: Styling borders
21:15: Styling the img tag
24:15: Styling the body tagThe Assignment
I’d like you to follow along with the video by completing the following (it will help having Duckett chapter 8 open, as well):
- Copy the appropriate code from Marie Mosely’s article on Box Sizing and paste it into the appropriate part of main.css, as described in the video.
- Add the necessary code to ensure centering boxes on your page, as described in the video
- Style margins, padding, borders, images, and the body, as appropriate, and as discussed in the video
Try sending questions you have to members of your coding group, and if they aren’t able to help, send them my way and bring additional questions you have to class to talk about with your coding group.
Have fun with it!
W 3/13: Full class meeting (boxes)
F 3/15: No Class — Midterm Conferences
Week Nine: Floats and Divs, Intro to Responsive Design
Assignment for Monday, 3/18
The first requirement in Project 1 is your page should “contain a writer, artist, or professional statement based on your Why, How, and What statements composed in and for class.” You used or adapted your Why statements in your Design Persona.For Monday, I’d like you to code into your portfolio.html page your “writer, artist, or professional statement based on your Why, How, and What statements.” Place the statement above your portfolio items. Code and style it using appropriate HTML5 and CSS tags.
If you have yet to complete the work for Wednesday, March 13, that MUST be done before you move on to the work for Monday.
The coding assignment for Monday is going to introduce you to positioning elements on your page using class/id and float. These are important concepts to learn, as you will use them whenever you code more advanced layouts. The first video introduces you to the concepts—watch it carefully and take notes—and the second video walks you through the implementation.
To prepare for the videos, please read in Duckett: pages 181 – 186, and 369 – 376. You will also need to have open this document: floating-s24.pdf.
The Videos
The first video introduces the concept of positing using class/id and floats, explaining how and why things work. We must understand the how and why before we implement. The second video discusses implementation. Please watch them in order, taking notes on the first. The second is designed to walk you through completing the work while you go.This video discusses how to position elements on your page using class/id and floats. Specifically, it covers:
0:00: Intro to positioning parts of your page and what you should have open while watching the video, as well as the assignment requirement that your portfolio items appear side-by-side
2:15: Overview of sketch depicting elements side-by-side
4:40: Intro to class and id attributes
6:40: Defining the class attribute, which can be used multiple times
7:15: Defining the id attribute, which can only be used once
8:00: Coding class/id attributes in HTML and the importance of naming
9:35: Coding class/id attributes in CSS and how HTML and CSS are connected
10:20: How the class/id attributes look in actual HTML and CSS code and why I am using class instead of id
12:00: Intro to positioning using floats and widthsThis video walks you through positioning your works samples on your portfolio.html page using class/id, float, and clear. Specifically, it covers:
0:00: Intro message about ignoring overflow: auto; in the video
1:05: Intro to positioning elements and what documents you need to have open while watching the video
3:35: Removing the height and width functions from the img in portfolio.html
5:35: Adding classes to the section tags in portfolio.html
8:05: adding text-align: center to the html selector in main.css
9:05: Adding section.left and section.right selectors and associated code to main.css, and explaining the code
11:45: Explaining how browsers interpret and present floated elements and the clear attribute
17:35: Adding the code necessary to ensure the images fit within the boxes by styling the figure and img
23:30: Making additional adjustments to the codeThe Assignment
Please complete the steps in the second video so you have by Monday your portfolio items side by side, using floating-s24.pdf as a guide.Remember your Week 8 Weekly Update this week was due on Friday.
If you have any questions, please let me know.
M 3/18: Full class meeting (class/id and float)
Hand out Portfolio Rough Draft Checklist (.pdf)
Assignment for Wednesday, 3/20
The assignments for this week are going to help you transition portfolio.html and main.css from one that is just designed for the computer screen, to one that is designed for phone, tablet, and computer screens. In other words, it will become responsive.First, however, for class on Wednesday, be sure you have been able to check off each item on the the Project 1 Rough Draft Checklist (.pdf). If you are unsure about anything on the checklist, circle the item and come to class with questions.
There is one video, but it will be used for the whole week.
For Wednesday, you will be watching 0:00-29:00 only. (Note: This was the first video I made post-COVID back in Spring 2020 so there are a few hiccups in there as I was working through the kinks of video making.)
To complete the work you will need paper/notebook and a pencil to draw sketches and preparing-for-phone-tablet-s24.docx.
I recommend a pencil and not a pen so you can erase, as needed.
The Video
This video on responsive design covers:For Wednesday, 3/20
0:00: Review of the main.css stylesheet
4:35: Creating sketches for phone and tablet screens
12:50: Moving from sketches to code
16:20: Completing the preparing-for-phone-tablet-s24.docx handout to help you move your code
22:35: Removing redundancy from your codeThe Assignment
For Wednesday, first please first read “A Reference Guide For Typography In Mobile Web Design” by Suzanne Scacca, playing close attention to her discussions on fonts, font-sizing, and screen real estate (that is, how to take advantage of space on a small screen). The first 1/3 of the article is more intro to design-in-general stuff. It’s really well-written and -presented, but you can scroll through it if it’s review. Definitely start reading in earnest at the heading, “Typography For Mobile Web Design: What You Need To Know.”Then, please watch ONLY 0:00 – 29:00 of the above video and complete:
- the sketches
- preparing-for-phone-tablet-s24.docx handout, and
- the redundancy changes as I did in the video.
It might be useful for you to complete the sketches and the handout by hand and not on the computer, which is just fine.
However you choose to complete them, please bring to class the following: the three numbered sketches and completed handout. Use Scacca’s discussions on mobile design to inform your phone and tablet font sizing. I am going to be asking you why you decided to size things the way to have and I will be expecting responses that reference Scacca.
If you have any questions, please let me know.
W 3/20: Full class meeting (responsive design; intro to validating code)
Assignment for Friday, 3/22
There are two parts to this assignment. Complete them both. Open Coding is available on Thursday, as usual, so please sign up!We have Individual meetings on Friday, next Monday and Wednesday. Make sure you know when you are meeting.
If you have questions about the work, please first direct them to your coding group and if you’re still stumped, send ’em my way.
Part 1. More Responsive Design
Please watch the remainder of the Preparing for Responsive Design video you’ve been watching this week (28:30 – end), which covers coding the phone screen and uploading the changes.For Friday, please complete the process as discussed in the video. That is:
- style your phone screen, and
- if you feel confident, also style your tablet screen, as well.
Part 2. Validating Your Code
The following video will introduce you to validating your code, which is the process of using software to determine if there are errors in your code. To validate your code, you’ll have to install the Web Developer Toolbar Extension in Firefox Developer Edition (if you haven’t already). You need to have Firefox Developer Edition open when you click on the link.The Video
This video discusses strategies for checking for errors and validating that your code is correct using online validation tools and the Web Developer Toolbar. It covers:
0:00: Installing the Web Developer Toolbar Extension in Firefox Developer Edition
1:35: Error Checking Steps
3:00: Validating HTML using the Web Developer Toolbar
6:00: Validating CSS using the Web Developer Toolbar
13:15: Additional Error Checking in the Code
16:30: Review of Using Responsive Design Mode and Talking About Mobile FeaturesNote that the last minute or two vanished when I was editing, so the video ends rather abruptly, but that was just final parting words.
F 3/22: Meeting Individually via Zoom (responsive design); Validating code; adding additional portfolio items
Project 1 Drafts Due by Start of Individual Meeting
Week Ten: Project 1 Drafts
Assignment for Monday, 3/25
As you continue to work on your portfolio page for computer, phone, and tablet, I have added three videos, a short one on styling links, another on embedding responsive media (audio, video, etc.), which follows along with the Responsive Media Embedding Tutorial (.docx), and another on background images and adding footers (use bg-images-footer-s23.docx).You are only required to watch and accurately style your links. The other two videos are only necessary if you have embeddable media to add to your portfolio and/or would like to try to add background images. Everyone will be required to have footers in Project 2, so you might start to add those now.
You have all week to work on these, but try to implement them sooner rather than later just in case you run into some issues.
The Videos
This video discusses styling links using CSS. It’s only 5 minutes, so no timestamps needed.
This video discusses embedding responsive video and audio, following the instructions in the Responsive Media Embedding Tutorial (.docx). It covers:
0:00: Introductory remarks and the tutorial we’re following
1:30: Creating the HTML5 skeleton so you can easily enter the media code, including the importance of comments
4:10: Styling and explaining the .media-responsive class in your css file
5:25: Styling and explaining the iframe
6:25: Creating the media-responsive class in the HTML
8:05: Copying YouTube embed code and pasting it within media-responsive class in the HTML
9:05: Copying Vimeo embed code and pasting it within media-responsive class in the HTML
10:40: Copying SoundCloud embed code and pasting it within media-responsive class in the HTML
11:40: Uploading the css file, seeing the media on the site, and adding margins between the media to add some white space
13:00: Testing to make sure the media is responsive on phone, tablet, and computerThis video covers how to add a single background image and add a background pattern that tiles throughout the whole page. The video follows the instructions on page 1 in bg-images-footer-f22.docx and covers:
0:00: Coding a single background image
11:20: Coding a background patternIf you have any questions, as always, please let me know.
M 3/25: Meeting Individually via Zoom: embedding media, styling links
W 3/27: Meeting Individually via Zoom
F 3/29: No Class — Easter Break
Week Eleven: Project 2 and Prior Students
M 4/1: No Class — Easter Break
W 4/3: Full class meeting: Getting Back into the swing of things
Portfolio Final Draft Checklist (.pdf)
F 4/5: Full class Meeting: Finishing up work on Project 1
Release Project 2: Responsive, Accessible Professional Web Site
Project 1: Responsive, Accessible Portfolio Page and Reflections Due by 11:00pm
Week Twelve: About, Contact; Former Students Visiting
Assignment for Monday, 4/8
The homework for Monday is going to get us started building our professional website for Project 2, specially by creating our About and Contact pages. Before moving on, please read through the Project 2: Responsive, Accessible Web Site assignment page and come to class with any questions you have.While we’re getting started on Project 2, please do not edit your portfolio.html file until I let you know you can. I need to assess them first.
Before getting to the coding, I’d like you to complete the below form. On Friday, 4/12, we will have prior Web Design students visiting us again to talk about their experiences moving from Project 1 to Project 2 and completing Project 2. Please add up to three questions you’d like the students to address. Make your questions specific to where we are in the semester. I’ll collate and prepare them for Friday, but I’ll need time to do that, which is why I’d like them posted by Thursday.
https://forms.gle/LYkHWkE9GAR1iwcKA
Now, onto the coding.
For Monday, please create your About page and get started with your Contact page. Come to class with any questions you have.
The Video
This video discusses Project 2 and creating your about.html and contact.html pages. It covers:
0:00: Introduction and a review of Project 2: Responsible, Accessible Professional Site assignment
3:50: How to create about.html and contact.html
11:25: How to create and embed your form using the free form creating site, Wufoo
M 4/8: Full class meeting: About and Contact Pages
W 4/10: COM Career Day — Class Canceled
F 4/12: Full class meeting: Meeting with prior web design students
Week Thirteen: Project 2 Work; Home Pages; Navigation
Assignment for Monday, 4/15
With the assignment for Monday, we are finally getting back to our home (index.html) page. The home page we’re creating is going to act like a landing page, using images of your own choosing. These images should tell a story about who you are without any words. Doing so will introduce us to having another css document, imagehome.css. I have provided a template, which is on the Project 2 assignment page.The images MUST be the exact sizes as described in the video and on the Project 2 assignment page. If they are not the exact sizes, they will not display properly on each device. The images cannot be resized; they must be CROPPED to the exact size.
This video describes the process of creating full screen images for your homepage on all screen sizes. It covers:
0:00: Introduction
2:37: Sizing images for phone, table, and computer screens (Note: you cannot simply resize an image; you must CROP them to the actual sizes on the assignment page.)
7:33: The project templates and how to copy them
9:35: Detailed discussion of the index.html template
12:27: Detailed discussion of the imagehome.css template and styling the text
21:15: Styling the imagesCode at least 2 of the 3 images by the start of class on Monday. If you don’t know which images you want, code in some placeholder images just so you know you can get it to work.
If you have any questions, first address them to your coding group and then me, if needed.
Don’t forget to complete your Story of Learning Weekly Update.
M 4/15: Full Class Meeting: New Home Page
Assignment for Wednesday, 4/17
There are three parts to this work for Wednesday.Part 1.
Fix all HTML and CSS errors identified by the HTML Validator in your portfolio.html and the CSS Validator in your main.css. From now on, make sure you regularly run the validators on all your HTML and CSS files.Part 2.
The work for Wednesday will see you styling a responsive navigation bar that you will place on each page of your website, starting with the new index.html page. For Wednesday, I’d like you have it implemented on your index.html, about.html, portfolio.html, and contact.html. I have provided a nav.css template, which is on the Project 2 assignment page.For the below video, please only watch until 28:00. I have updated the nav.css template to make styling the navigation on the index.html different from the inner pages much easier than is in this video.
This video on navigation covers:
0:00: Introduction to navigation
2:00: Getting the nav.css template (see the Project 2 assignment page) and discussing how reset styles work when you have multiple stylesheets styling one html page
4:57: Explaining the navigation code in index.html
7:43: Explaining the navigation code in nav.css
13:35: Adding navigation code to about.html, portfolio.html, and contact.html
18:33: Making edited to the nav.css and main.css to make sure the mobile nav bar doesn’t cover your name
STOP AT 28:00.If you have any questions, first address them to your coding group and then me, if needed.
Part 3.
Now that the navigation has been assigned, we have come to the part of the semester where your web sites are completely in your hands. Though there are requirements listed for the home page, about page, and contact page, along with some things on the style sheets on the assignment page and there will be a checklist to ensure you have those requirements, you are now encouraged to make the site your own by expanding your site out to additional portfolio-related pages (if you have the content to support such an expansion), trying more advanced designs, and other design and content features (perhaps as you wrote about in your Design Persona).You should keep working on your site for the rest of the semester.
Prior to your individual meeting, I’d like you to have all of the work up to now completed: about and contact pages, navigation bar, and updated home screens.
I’d also like you to bring with you some sketches as to how you would like your new portfolio.html page to look, as well as sketches for any additional pages you might be creating.
I’d also like you to look at the portfolio examples you found weeks ago, as well as prior Web Design student web pages, and come to your meeting with up to 3 design or aesthetics features you’d like to to try implement on your site. Those features should consistent with the brand traits you described in your design personas. Bring those ideas with you to your meeting.
You can find prior semester pages at:
- Fall 2023
- Spring 2023
- Fall 2022
- Spring 2022
- Fall 2021
- Spring 2021
- Fall 2020
- Spring 2020
- Fall 2019
- Spring 2019
Note that the farther back you go, the more likely the web sites will, sadly, no longer be active.
When looking for features, do not choose the following:
- full screen home page
- navigation bar
- about and contact pages
- positioning 3 or more items in a row — I will assign a video about that for Friday
Also try to find things that will push your site in interesting way. For each you choose, view the web page source code and see if you can figure out how that feature was implemented.
Be ready to talk about each in your meeting.
W 4/17: Meeting Individually via Zoom; Navigation
Project #2 Rough Draft Due at meeting time
Assignment for Friday, 4/19
This assignment will include the final tutorial I will be providing for you. The rest of the semester, you should dedicate yourself to creating the website you want to create and we will discuss at your individual conferences what that actually is. My goal is to help you achieve that website but it will also take dedication from you — dedication that moves from following instructions to taking risks with your coding so you begin to more fully understand not only how to style or present something but why it is working.The video for the week shows you how to position more than two elements in a row, which is extremely helpful for presenting portfolio items. Be aware, there is some minor math involved.
This video introduces floating three or more boxes (or other elements) in a rows. It covers:
0:00: Introduction
1:00: Thinking about widths of elements inside another box
2:00: Sizing the boxes in percentages
3:00: Calculating the width of the margins
4:55: The CSS and floating left
7:15: The HTML element skeleton
8:10: Writing the HTML5 code in Brackets, including using comments
11:15: Writing the CSS in Brackets
13:05: Making a second row
14:20: Ensuring that the rows and elements are responsive
14:50: Verifying that the figure width is exactly how I want it
15:15: Concluding remarks on margins between rows and if you have more than three elements in a rowIf you have any questions, please present them to your coding group first and then send to me if you can’t figure it out.
Don’t forgot to complete your Story of Learning Weekly Update.
F 4/19: Meeting Individually via Zoom
Week Fourteen: Project 2 Work
M 4/22: Meeting Individually via Zoom
W 4/24: Full Class
F 4/26: Full Class
Week Fifteen: Project 2 Work
M 4/29: Full Class
Project 2 Final Draft Checklist (.pdf)
W 5/1: Full Class
F 5/3: Full Class
Discuss Final Story of Learning
Last Day of Class
Week Sixteen: Final Open Coding and Final Work Due dates
Final’s Week Open Coding: Monday 5/6: 10:00 – 12:00; Tuesday, 5/7: 1:00 – 3:00
5/8: Professional Site Due by 11:00pm
5/9: Final Story of Learning Due by 11:00pm
Monday, 5/13: Grades Submitted to University